I couldn’t believe it at first, but the manufacturer’s original USB cable is unshielded.
This could explain the USB error when connecting the PICO.
How can I change this?
I really wanted to keep the nice LEMO connector!
Fortunately, the LEMO connector is shielded. So how about using a USB-A to USB-something cable and soldering it to the LEMO connector instead of the original unshielded cable?
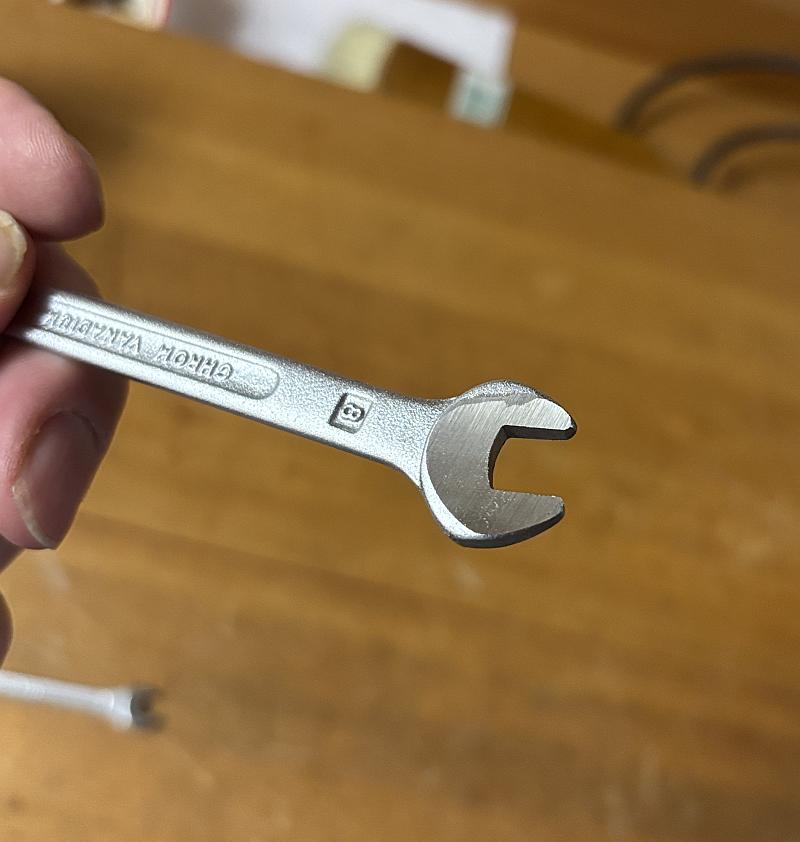
Disassembling the Lemo connector requires a particularly flat open-end wrench, which I didn’t have. So I ground one of my open-end wrenches with the grinder until it fit the plug:
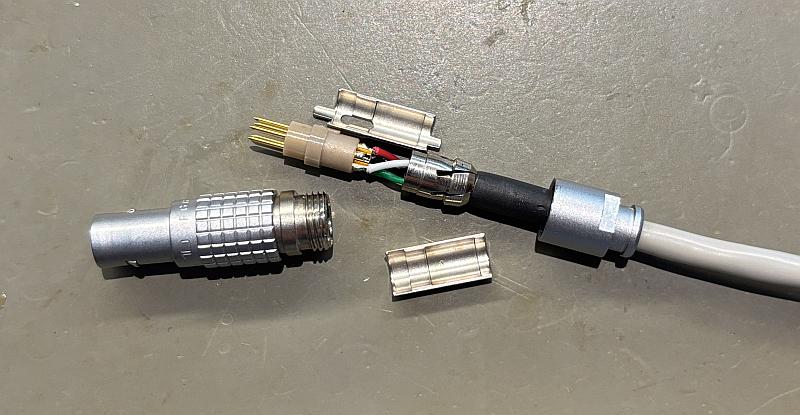
After this modification, disassembling the connector and replacing the cable with a shielded one was easy:
After assembling the cable and trying out the connection, I was very disappointed when another USB error was reported!
Are the wire lengths between the Lemo connector and the Pico too long?
But how can I reduce the cable lengths to a minimum without enlarging the cutout on the PCB to allow the cables to reach the underside of the PCB where my Pico is located?
Then I realized that it might be possible to push the LEMO socket out of the housing a little by placing some kind of washer between the LEMO socket and the housing.
Where can I get a suitable washer? I searched and searched, and finally, I realized that the mounting nut on an insulated BNC socket was exactly the right height. I just had to drill it out with a 9 mm drill bit, and voilà—it might fit!
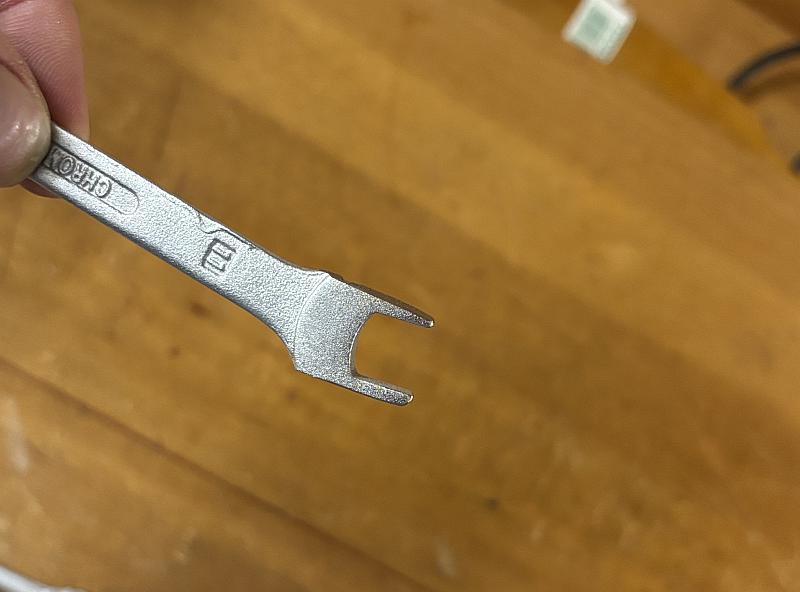
But how do I loosen the LEMO socket nut? For that, I needed a special tool, which I made from another open-end wrench using my grinder:
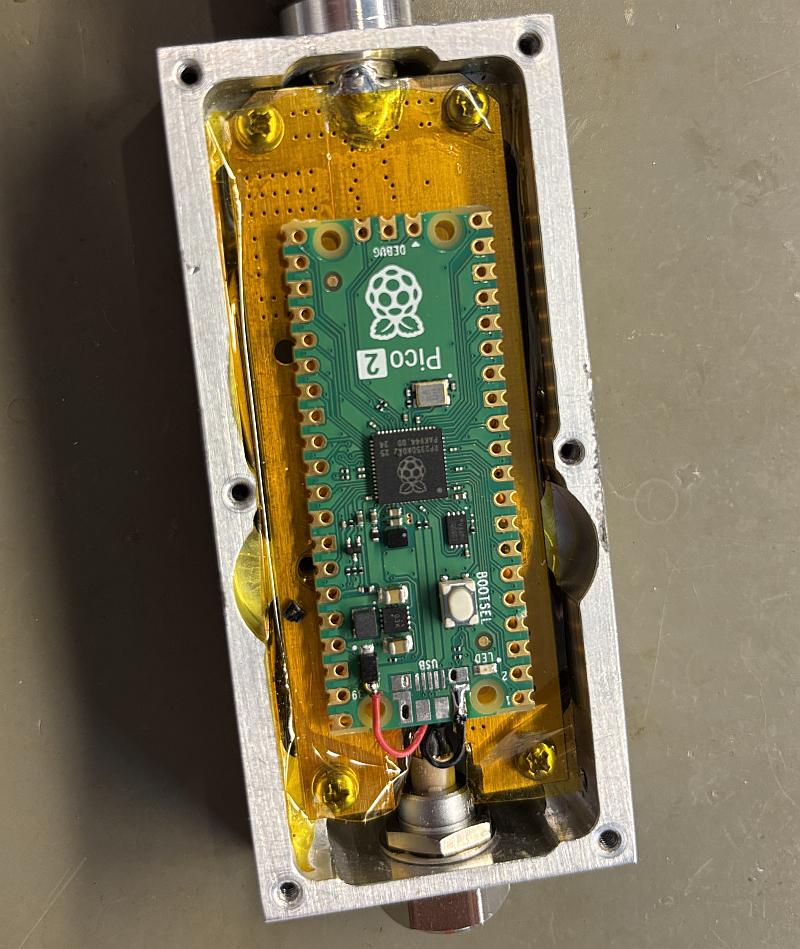
Now I was able to remove the Lemo connector and reinstall it with the washer. I was now able to make the connection to the Pico very short:
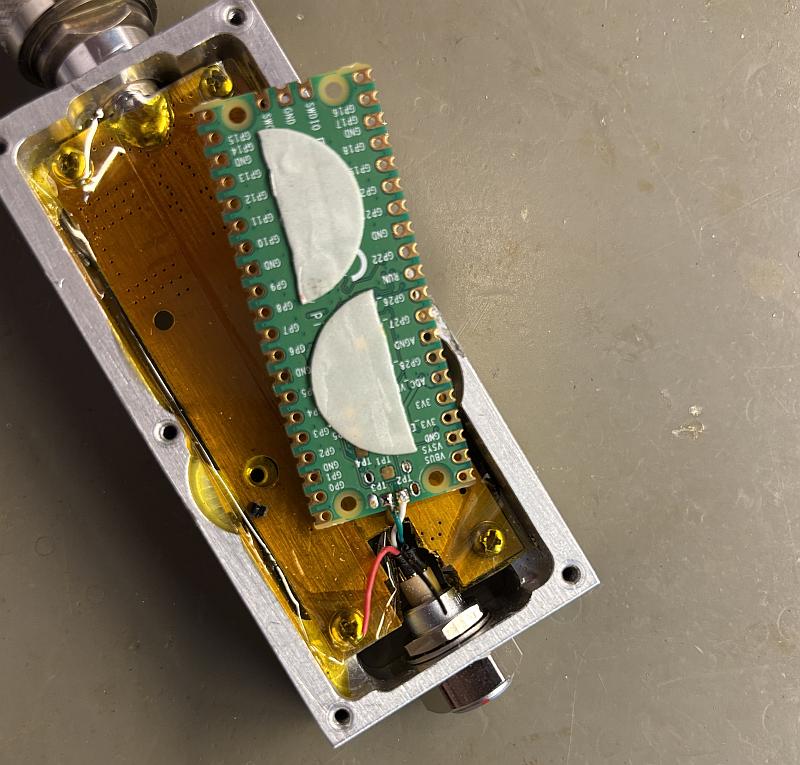
I then soldered the power cables and glued the Pico in place.
And then—what can I say—the Pico was recognized without error and has been working flawlessly on the USB bus ever since.